Assigning Icons to WordPress Categories with Advanced Custom Fields and FontAwesome
Disclaimer: this was written a couple years ago and is in need of an overhaul.
Advanced Custom Fields and FontAwesome are two things I use on almost every project I work on. ACF is so built-in to my workflow that I couldn’t live without it at this point. When building this theme, I wanted to assign FontAwesome icons to specific categories I would be posting under, and I thought I would share my process for anyone thinking of doing the same thing.
1. Create your own custom field
Assuming you’re using WordPress’ built-in categories, you’ll just need to create a text field that displays on the taxonomy term of category. I take every opportunity I get to use the word cat in my code, so for this example we’re naming the field cat_icon.
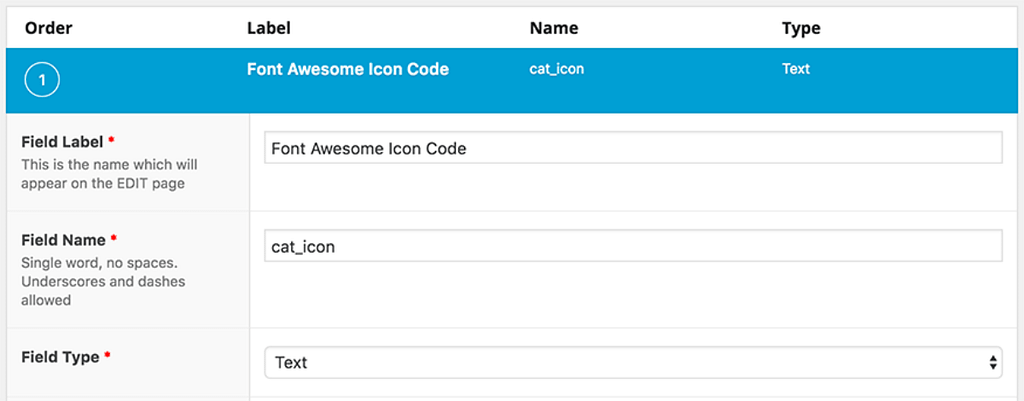
That gives us a text field on the edit screen for every category. In this example, we’re using my ‘WordPress’ category, and the corresponding FontAwesome icon for WordPress. This is what you see when you check out the page for the WP icon on FontAwesome.
2. Add your icon code to your text field
All we need to add to the text field in is what comes after fa-. In this case, we just add “wordpress” in our text field. Navigate to Posts > Categories and click on the category you want to have an icon. Scroll down to the bottom and find your newly-created text field. Enter the word you copied from the FontAwesome page and hit save.
3. Add this code to your WordPress theme
For this theme, I’m adding the category icons to the single view of my blog articles, so I’m editing single.php. You may want to add them to your main blog index, your sidebar, or somewhere else. Wherever you are displaying your category icons, add this php snippet:
<?php

 // load all 'category' terms for the post
 $terms = get_the_terms( get_the_ID(), 'category');

 // we will use the first term to load ACF data from
 if( !empty($terms) ) {

 $term = array_pop($terms);
 $icon = get_field('cat_icon', $term );
 // do something with $icon
 }

?>
This saves your FontAwesome magic word as a variable that you can echo where you need it. Don’t forget to change cat_icon if you decided to use a different field name. In my case, I’m adding the icon below the post’s publication date, and following it with a link to the category. Note: this will look best with only one category assigned to your post.
<i class="fa fa-<?php echo $icon; ?>"></i><?php the_category(); ?>In my theme I have a .flex class that applies some basic flexbox attributes when I need them, but for this example you can use this simple CSS to style your section.
section.post-cat {
 display: -webkit-flex;
 display: flex;
 -webkit-flex-direction: row;
 flex-direction: row;
 -webkit-justify-content: flex-start;
 justify-content: flex-start;
}

section.post-cat ul {
 list-style: none;
}

section.post-cat ul li {
 display: inline;
}

section.post-cat i {
 margin-right: 5px;
 vertical-align: middle;
}
That’s about all there is! FontAwesome keeps getting better and better (although I wish they had a Kickstarter icon) so I’m sure you can find an icon for any of your needs.